However, despite these advancements toughest challenge for digital cameras is dealing with noise. When you shoot a photo outdoors in broad daylight and you'll get crisp details and rich colors. in the board daylight or good lighting condition, the ISO is lowest (at around 80 or 100). But the digital camera boosts the sensitivity to 400 or 800 in low light. this causes grainy artifacts that ruin the images.
check out the noise ninja or download
STEP1

Noise Ninja is one of the top-rated and easiest tools for curing noisy images. It's available as a photoshop plug-in as well as standalone application.
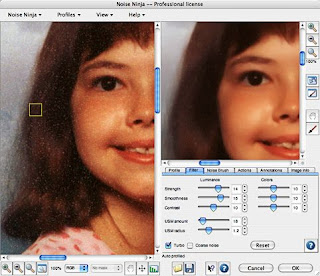
On opening the image in Noise Ninja the noise profiler section will show up in the left panel. Click and drag patches on the plain areas of the images that don't have any detail. Avoid regions that are pitch black or over-exposed. The software uses these samples to calculate the values for noise removal in the next step. Use the scroll wheel to zoom in/out. The image can be dragged around using the left mouse button while keeping the spacebar pressed.
STEP 2

Click on the noise filter button (with the magic wand icon) when you're done with profiling the image. Noise ninja automatically determines the values for luminance, colors and sharpening. Clicking anywhere on the image shows the output preview of that portion in a small box with dotted lines. Zoom into the image and drag the box around to preview the various portions. If noise persists, increase the luminance strength by dragging its slider. But be careful not to overdo it as it will result in loss of details. The 'Show advanced controls' options allows you to adjust even the smoothness and contrast.
STEP 3
After you're done with adjusting the noise filter parameter and previewing the result, the final step is applying the filter and saving the image. Click the remove noise button to apply the filter. The result can be saved in JPG or TIFF format. Before saving the imag,e, you have the option to set the image quality of JPG and color depth. The higher the quality, the larger the file. You can also save or remove the EXIF data, data that stored in the pictures itself. showing what camera was when the photo was taken
PROCCESSING MULTIPLE IMAGES
If you have hundreds of image to process, you can use the batch process function in the file menu. In that case, you can tell the software to profile the images automatically before applying the noise filter. you can also create profiles for different ISO levels for your camera by referring to the built-in user guide.


No comments:
Post a Comment