This is a step-by-step tutorial.what you need is some basic knowledge of photoshop. it's not very difficult to follow up so just try and have fun with the editing.There are only 5 steps to achieve the final result, SIMPLE and EASY!^^
First, what you need is:
- photoshop 7 and above
- photoshop brushes, you can download from here
It's safe to download, no virus/Trojan/spy-ware/...bla bla bla
this is the how the
brushes look like:

ok! i don't want to wasting the time and let's begin the tutorial!
here we go!
i use the cute face on fruit^^ it's cute! oppss...craps a lot!
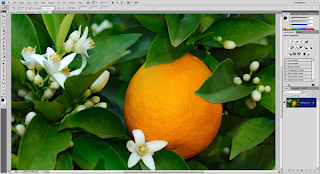
- Step 1- Open an image of a fruit on photoshop
Choose File > Open, browse for the image file, then click OK.
- Step 2- create a new layer
Choose Layer > New Layer to create a new layer. This layer will hold the image of the cute face.

Make sure that you've loaded the brushes (How to load the brushes?is ok! i will post someday =p) into Photoshop. Select the Brush tool then right click anywhere on the document window to see the list of brushes. Pick the face that you’d like to use.

- Step 4- Apply the cute face =)
Paint the cute face on the fruit. Use the transform tools (Edit > Transform) if you like to distort the face.

- Step5- Blend the face into the fruits texture
Choose Layer > Layer Style > Blending Options. On the bottom of the window, hold the alt key then drag the white input slider towards the left until the face looks like it is drawn on the fruit. Click Ok when done.

Mission Complete! and this the final result of the edited photo^^ have fun


 ok! i don't want to wasting the time and let's begin the tutorial!


wow. nice thanks a lot for sharing. been looking around for a long time. my photoshop skill is like 0.1 haha
ReplyDeletenice teach
ReplyDeletefrom Nikel Khor
interesting !!!!
ReplyDeleteA great steps your share for us.. I really appreciate that your post very useful.thanks a lot
ReplyDelete